设计实验1:数字雕刻与模型制作 | Design Experiment 1: Digital Sculpting and Model Making
(2024版 | Edition 2024)
设计实验1:数字雕刻与模型制作
Design Experiment 1:
Digital Sculpting and Model Making
(2024版 | Edition 2024)
基本信息 | Basic Information
| 课程性质 | Course Type: | 必修 | Compulsory | 课程编号 | Course ID: | 5000292000702 | 授课语言 | Language: | 中文 | Chinese |
| 先修要求 | Prerequisite: | 无 | None | 学分 | Credits: | 2 | 课内学时 | Total Hours: | 34 |
| 课程性质 | Course Type:必修 | Compulsory | 课程编号 | Course ID:5000292000702 |
| 授课语言 | Language:中文 | Chinese | 先修要求 | Prerequisite:无 | None |
| 学分 | Credits:2 | 课内学时 | Total Hours:34 |
课程性质 | Course Type:必修 | Compulsory
课程编号 | Course ID:5000292000702
授课语言 | Language:中文 | Chinese
先修要求 | Prerequisite:无 | None
学分 | Credits:2
课内学时 | Total Hours:34
课程简介 | Course Introduction
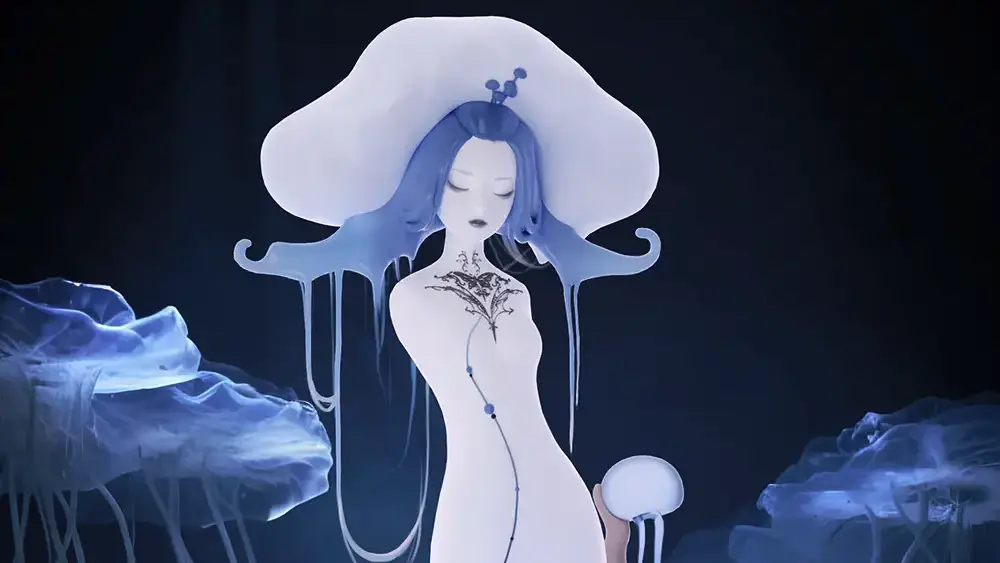
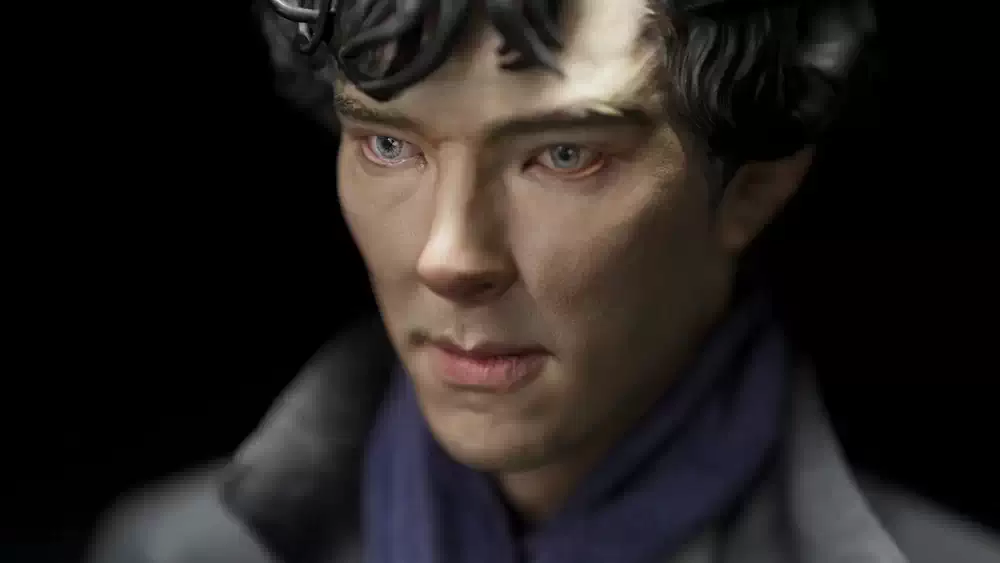
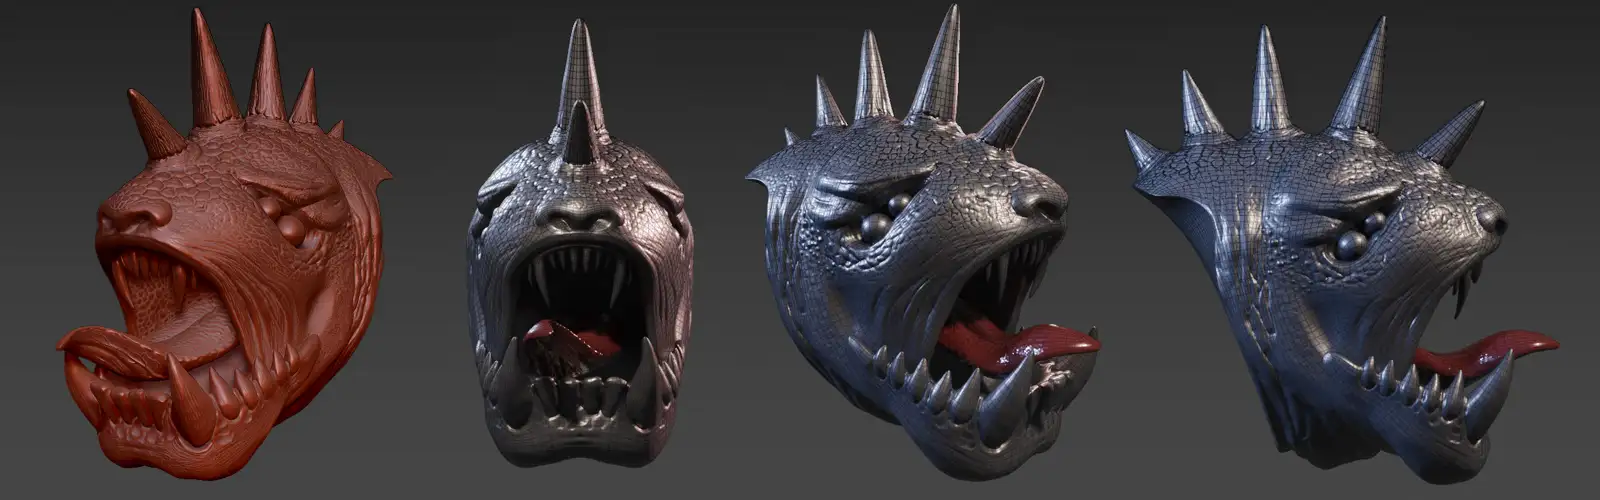
数字雕刻被广泛运用于影视、动画、游戏、艺术、交互软件等诸多领域,日益成为设计师不可或缺的基础技能,而三维打印因其成本下降日益普及,越来越多地进入了我们的日常生活。本课程以设计并制作一款精美的潮玩/手办为目标,带领同学们从零开始学习数字雕刻、三维打印及模型涂装相关的知识与技艺。
Digital sculpting is widely used in many lines of industries including films, animation, games, interaction design, art and so forth. It has virtually become an indispensable item in designers’ toolbox. Meanwhile, 3D printing is turning increasingly popular and common in our daily lives because of its continuously lowering cost. The target of this course is to design and fabricate an elegant piece of designer toy or figure sculpture. Students are expected to learn with teachers’ help the knowledge and skills of digital sculpting, 3D printing and model painting from scratch and finally actualize their creative ideas.
▼ 学习要求 | Learning Requirements
▲ 学习要求 | Learning Requirements
● 课堂学习与课外自学充分结合 | Classroom learning and out-of-class self-learning are both needed.
● 关注艺术理论、技术原理、方法与流程的学习 | Focus on the learning of art theories, technological principles, methodology and workflow.
● 允许选用不同的软件 | The choice of software that is not covered in this course is permitted.
● 培养动手能力 | Enhance your operational ability (making and fixing things).
● 想“混”个学分的同学请退选 | Quit this course if credits are all you need.
学习评价 | Learning Evaluation
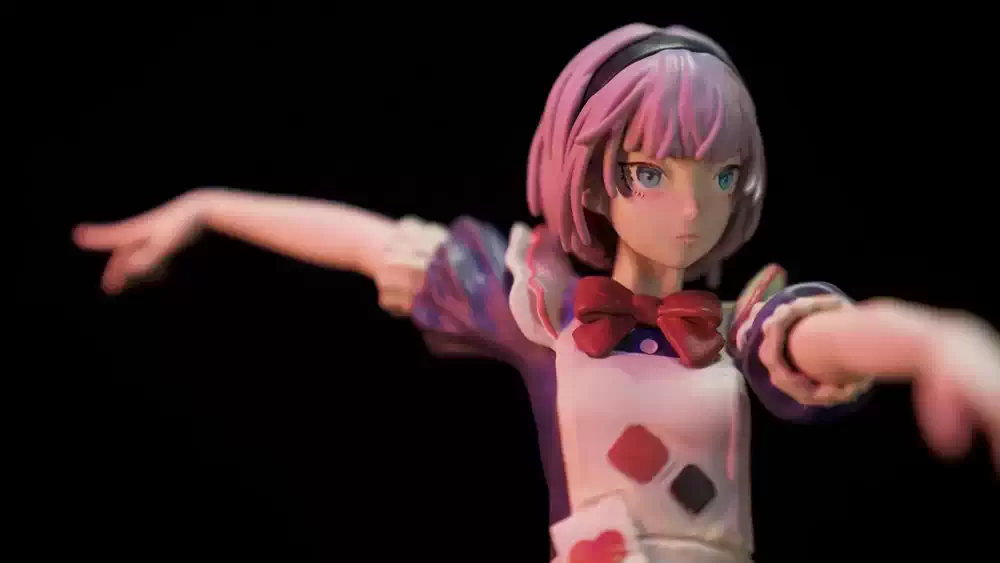
本课程要求学生自行确定创作主题与难度水平,以一个原创的有机或机械角色为目标完成概念设计、数字雕刻与模型制作。期末成果应包含Zbrush工程文件、3张不同角度的渲染图以及经由三维打印与涂装完成的实物模型及其照片。
This course requires each student to create an original organic or robotic character. He/she needs to define the topic of his/her own creation and choose an appropriate difficulty level. The workflow usually starts with concept design followed by digital sculpting and model fabrication. The final outcome shall include Zbrush project files, 3 renderings from different angles, and a 3D printed and painted physical model and its photos.
▼ 成绩构成 | How the score is given
▲ 成绩构成 | How the score is given
● 出勤记录 | attendance: 10%
-每次缺勤扣2分,扣完为止 | each absence results in -2 marks
● 数字雕刻 | digital sculpting: 50%
-概念设计 | the quality of conceptual desgin: 20%
| 4 | 8 | 12 | 16 | 20 |
| 直接挪用第三方设计方案,或设计过于简单、缺乏基本审美品质 | 3rd-party design is directly used, or the desing is too simple or lacks basic artistic quality. | 将未经加工的AIGC图作为设计方案,或偏于简单且美感不足 | Unprocessed AIGC images are used as design result, or it is simple and lacks artistic quality. | 设计方案为原创但令人感觉似曾相识,或设计偏于简单且美感不足 | The design is original but feels familiar, or it is simple and lacks artistic quality. | 设计方案原创性较好,但仍有模仿痕迹;设计方案艺术性较强 | The design has good originality, but with a hint of imitation. It has good artistic quality. | 设计方案原创性强,充分体现出作者的想象力、创造力,且细节精致、形象美观 | The design is highly original, reflecting the author’s imagination and creativity, and is full of details and beauty. |
-雕刻技术 | the mastery of digital scultping techniques: 30%
| 6 | 12 | 18 | 24 | 30 |
| 形态过于简陋、模型扭曲变形;以窗口截图代替渲染图 | The model is oversimplified and distorted. Screen captures are submitted instead of renderings. | 与设计方案相比存在局部缺失或严重失真,或存在较严重的技术缺陷;简单渲染,效果一般 | The model is partially missing or severely distorted when compared with the design. There are serious technical defects. The renderings are simple. | 模型基本形态与基本结构符合设计方案,存在技术缺陷但并不严重;渲染图能较好展现雕刻成果 | The model generally matches the design. There are minor technical flaws. The renderings present the result well. | 模型整体与设计方案吻合度较高,技术工具运用基本合理,渲染效果较好 | The model matches the design well. Techniques are used properly. The quality of the renderings is good. | 熟练运用雕刻软件、布线疏密合理、模型细节丰富、形态流畅自然、渲染效果美观,与设计方案高度相符 | A mastery of digital sculpting is shown with proper topology, fine details, natural shapes. The renderings are beautiful and present the design in an artistic way. |
● 模型制作 | model making: 40%
-根据实物模型制作结果的品质评分 | scores will be given based on the quality of the physical model
| 8 | 16 | 24 | 32 | 40 |
| 待拟 | 待拟 | 待拟 | 待拟 | 待拟 |
● 知识分享 | bonus for knowledge sharing: ≤10%
-推荐或自选主题,但需与课程相关 | You may choose a proposed topic or propose your own for the knowledge sharing seminar, but it must be related to the course.
-每次分享总加分不超过7分(1人)或10分(多人) | Total bonus points each time amount up to 7 (single speaker) or 10 (multiple speakers).
▼ 期末作业 | Requirements on the Final Project
▲ 期末作业 | Requirements on the Final Project
● 从以下两个主题中任选一个进行创作 | Pick one of the two topics below for your creation
主题1:山海万象 | Topic 1: Shanhai Beings
主题2:机械未来 | Topic 2: Robotic Future
● 设计方案必须为原创(可借助AI)| The design must be original (the help of AIGC is permitted).
● 自行选择风格(写实或卡通)并设置适合自己的难度 | You may decide on the art style (realistic or cartoon style) and a suitable challenging level.
● 对于简单形象而言,可创作系列角色以平衡工作量 | For simple characters, you may create a series of them to balance workload.
● 实物模型尺寸单个高度不小于12cm,系列作品不少3个 | A physical model shall be no less than 12cm high. A series shall contain at least 3 models.
● 涂装需覆盖整个模型,复杂程度可根据设计自行调整 | The painting must cover the whole model, and the complexity level can be set by yourself.
● 本次作业不允许使用任何第三方数字素材或成品模型 | No 3rd-party digital resources or ready-made phsical parts are allowed.
▼ 提交要求 | Submission Regulations
▲ 提交要求 | Submission Regulations
● 参考图和设计稿 | Reference images and design drafts
● 说明文本:含作品名称及100字以内作品简介 | A text file that includes the title of your work and a description of less than 100 characters.
● 3张不同角度.jpg渲染稿(其中1张为主视角),允许PS,渲染精度不低于2K(2560×1440/1440×2560)| At least 3 .jpg images rendered from different angles, including a main view. They may be processed in Photoshop. The minimal resolution is 2K (2560×1440/1440×2560).
● 工程文件(包含10个进度均匀的历史版本)| The project files, including 10 milestone versions evenly distributed in history.
● 手办实物模型及至少5张照片(不低于300dpi,4MB大小) | A physical model with no less than 5 photos (resolution > 300dpi, file size > 4mb).
● 模型制作过程记录影像(2-3分钟,1080p) | The recording of the model making process (2-3min, 1080p).
课程内容 | Course Content
-
01 课程内容与评价标准
- 1.1 课程内容
- 1.2 考核标准
-
02 初识数字雕刻与打印涂装
- 2.1 初识数字雕刻
- 2.2 初识模型制作
- 03 ZBrush简介
- 04 ZBrush中的基础建模与雕刻功能
- 05 在ZBrush中创建有机体模型
- 06 ZBrush的硬表面雕刻功能
- 07 在ZBrush中创建硬表面模型
- 08 在ZBrush中整理UV和绘制贴图
- 09 ZBrush中的材质、灯光与渲染
-
10 重拓扑与贴图烘焙
- 10.1 重拓扑的概念与价值
- 10.2 贴图烘焙概念与流程
- 10.3 在ZBrush中进行重拓扑与烘焙
- 11 模型拆分与准备
-
12 3D打印
- 12.1 FDM(PLA、ABS、PETG)
- 12.2 树脂
- 12.3 尼龙
-
13 打磨与涂装
-
13.1 打磨
- 13.1.1 练习:30目-2000目砂纸、刮刀等
- 13.1.2 去除3D打印支撑
- 13.1.3 去除3D打印层级纹
- 13.1.4 表面光滑
-
13.2 补土
- 13.2.1 材料:树脂,粘土,其他材料
- 13.2.2 去层级纹
- 13.2.3 连接件
- 13.2.4 细节、纹理
-
13.3 上色
- 13.3.1 练习
- 13.3.2 涂装
- 13.3.3 油性漆、水性漆、清漆
- 13.3.4 喷涂
- 13.3.5 手绘
- 13.3.6 打印
-
13.4 其它
- 13.4.1 衣服
- 13.4.2 配饰
- 13.4.3 头发
- 13.4.4 材质作旧
-
13.1 打磨
-
14 模型整合
- 14.1 组装
- 14.2 清洁
- 14.3 展示
- 14.4 保养
-
01 Course Content and Evaluation Criteria
- 1.1 Course Content
- 1.2 Evaluation Criteria
-
02 Getting to Know Digital Sculpting, 3D Printing & Painting
- 2.1 Getting to Know Digital Sculpting
- 2.2 Getting to Know Model Making
- 03 An Introduction to ZBrush
- 04 Basic Modeling and Sculpting Functions in ZBrush
- 05 Creating Organic Models in ZBrush
- 06 Hard Surface Modeling Functions in ZBrush
- 07 Creating Hard Surface Models in ZBrush
- 08 UV Unwrapping and Texture Painting in ZBrush
-
09 Materials, Lights and Rendering in ZBrush
- 9.1 Materials in ZBrush
- 9.2 Lights in ZBrush
-
9.3 Rendering
- 9.3.1 Rendering in ZBrush video
- 9.3.2 Using Keyshot
-
10 Retopology and Texture-baking
- 10.1 Concept and Values of Retopology
- 10.2 Texture Baking
- 10.3 Retopology Tools in Zbrush
- 11 Splitting and Preparing the Model
-
12 3D Printing
- 12.1 FDM(PLA、ABS、PETG)
- 12.2 Resin
- 12.3 Nylon
-
13 Polishing and Painting
-
13.1 Polishing
- 13.1.1 Practice: Polishing with a Erasing Knife and 30 to 2000 Grit Sandpaper
- 13.1.2 The Removal of Supporting Structures
- 13.1.3 The Removal of Stair-stepping Effect
- 13.1.4 Surface Smoothing
-
13.2 Putty
- 13.2.1 Materials: Resin, Clay, Other Materials
- 13.2.2 The Removal of Stair-stepping Effect
- 13.2.3 Connective Parts
- 13.2.4 Details and Texture
-
13.3 Ccolorization
- 13.3.1 Practice
- 13.3.2 Painting
- 13.3.3 Oily Paint, Water Paint, Varnish
- 13.3.4 Spray Brush
- 13.3.5 Free-hand Painting
- 13.3.6 Printing
-
13.4 Others
- 13.4.1 Garment
- 13.4.2 Props
- 13.4.3 Hair
- 13.4.4 Material Aging
-
13.1 Polishing
-
14 Integration
- 14.1 Assembly
- 14.2 Cleaning
- 14.3 Presentation
- 14.4 Maintenance
-
01 课程内容与评价标准
- 1.1 课程内容
- 1.2 考核标准
-
02 初识数字雕刻与打印涂装
- 2.1 初识数字雕刻
- 2.2 初识模型制作
- 03 ZBrush简介
- 04 ZBrush中的基础建模与雕刻功能
- 05 在ZBrush中创建有机体模型
- 06 ZBrush的硬表面雕刻功能
- 07 在ZBrush中创建硬表面模型
- 08 在ZBrush中整理UV和绘制贴图
- 09 ZBrush中的材质、灯光与渲染
-
10 重拓扑与贴图烘焙
- 10.1 重拓扑的概念与价值
- 10.2 贴图烘焙概念与流程
- 10.3 在ZBrush中进行重拓扑与烘焙
-
11 模型拆分与准备
-
11.1 准备工作
- 11.1.1 场景:基座、背景、材质
- 11.1.2 角色:姿态(比例、重心)
- 11.1.3 尺寸:3D打印尺寸
-
11.2 如何拆分模型
- 11.2.1 关节
- 11.2.2 组件
- 11.2.3 材质
-
11.1 准备工作
-
12 3D打印
- 12.1 FDM(PLA、ABS、PETG)
- 12.2 树脂
- 12.3 尼龙
-
13 打磨与涂装
-
13.1 打磨
- 13.1.1 练习:30目-2000目砂纸、刮刀等
- 13.1.2 去除3D打印支撑
- 13.1.3 去除3D打印层级纹
- 13.1.4 表面光滑
-
13.2 补土
- 13.2.1 材料:树脂,粘土,其他材料
- 13.2.2 去层级纹
- 13.2.3 连接件
- 13.2.4 细节、纹理
-
13.3 上色
- 13.3.1 练习
- 13.3.2 涂装
- 13.3.3 油性漆、水性漆、清漆
- 13.3.4 喷涂
- 13.3.5 手绘
- 13.3.6 打印
-
13.4 其它
- 13.4.1 衣服
- 13.4.2 配饰
- 13.4.3 头发
- 13.4.4 材质作旧
-
13.1 打磨
-
14 模型整合
- 14.1 组装
- 14.2 清洁
- 14.3 展示
- 14.4 保养
-
01 Course Content and Evaluation Criteria
- 1.1 Course Content
- 1.2 Evaluation Criteria
-
02 Getting to Know Digital Sculpting, 3D Printing & Painting
- 2.1 Getting to Know Digital Sculpting
- 2.2 Getting to Know Model Making
- 03 An Introduction to ZBrush
- 04 Fundamental Modeling and Sculpting Functions in ZBrush
- 05 Creating Organic Models in ZBrush
- 06 Hard Surface Modeling Functions in ZBrush
- 07 Creating Hard Surface Models in ZBrush
- 08 UV Unwrapping and Texture Painting in ZBrush
- 09 Materials, Lights and Rendering in ZBrush
-
10 Retopology and Texture-baking
- 10.1 Concept and Values of Retopology
- 10.2 Texture Baking
- 10.3 Retopology Tools in Zbrush
-
11 Splitting and Preparing the Model
-
11.1 Preparations
- 11.1.1 Scene: Base, Background, Materials
- 11.1.2 Character: Pose (Proportion, Center of Gravity)
- 11.1.3 Size: Dimensions of 3D Printing
-
11.2 How to Split Up a Model
- 11.2.1 Joints
- 11.2.2 Components
- 11.2.3 Materials
-
11.1 Preparations
-
12 3D Printing
- 12.1 FDM(PLA、ABS、PETG)
- 12.2 Resin
- 12.3 Nylon
-
13 Polishing and Painting
-
13.1 Polishing
- 13.1.1 Practice: Polishing with a Erasing Knife and 30 to 2000 Grit Sandpaper
- 13.1.2 The Removal of Supporting Structures
- 13.1.3 The Removal of Stair-stepping Effect
- 13.1.4 Surface Smoothing
-
13.2 Putty
- 13.2.1 Materials: Resin, Clay, Other Materials
- 13.2.2 The Removal of Stair-stepping Effect
- 13.2.3 Connective Parts
- 13.2.4 Details and Texture
-
13.3 Ccolorization
- 13.3.1 Practice
- 13.3.2 Painting
- 13.3.3 Oily Paint, Water Paint, Varnish
- 13.3.4 Spray Brush
- 13.3.5 Free-hand Painting
- 13.3.6 Printing
-
13.4 Others
- 13.4.1 Garment
- 13.4.2 Props
- 13.4.3 Hair
- 13.4.4 Material Aging
-
13.1 Polishing
-
14 Integration
- 14.1 Assembly
- 14.2 Cleaning
- 14.3 Presentation
- 14.4 Maintenance
学习资料 | Learning Materials
01. 课程内容与评价标准 | Course Content and Evaluation Criteria
课件中的图片/影片高清版 | high-res images/videos from the lecture slides
02. 初识数字雕刻与打印涂装 | Getting to Know Digital Sculpting, 3D Printing & Painting
无 | N/A
03. ZBrush简介 | An Introduction to ZBrush
Gizmo 3D教学视频 | video tutorials for Gizmo 3D
Gizmo 3D完整说明 | a complete guide to Gizmo 3D
Transpose教学视频 | video tutorials for Transpose
Transpose完整说明 | a complete guide to Transpose
ZBrush UI教学视频 | video tutorials for ZBrush UI
04. ZBrush中的基础建模与雕刻功能 | Fundamental Modeling and Sculpting Functions in ZBrush
基本几何体 | primitives
变形器 | deformations
Gizmo3D中的变形器 | deformations in Gizmo3D
常见笔刷 | commonly used brushes
> Standard,
DamStandard,
Layer,
Smooth Brushes & Modifiers,
Inflat,
Magnify,
Pinch,
Move,
Move Elastic / Move Topological(见下方视频 | see videos below),
Clay Brushes(见下方视频 | see videos below),
Clay Polish,
Flatten,
Planar,
Polish,
Trim Adaptive / Trim Dynamic(见下方视频 | see videos below),
Masking & Topology Masking & Masking Commands & Additional Masking Commands,
Select
笔刷相关教学视频 | video tutorials on brushes
Zbrush中的Alpha | Alpha in ZBrush
基本知识 | basic knowledge
笔刷中的Alpha相关设置 | Alpha settings
Alpha面板中的基本设置 | basic settings in the Alpha palette
修改Alpha效果 | modify Alpha
转换Alpha | transfer Alpha
Alpha与浅浮雕 | Alpha and bas-relief
基于Alpha的3D笔刷 | Alpha 3D Brush
使用Alpha 3D笔刷 | use Alpha 3D brushes
创建Alpha 3D笔刷 | create Alpha 3D brushes
Lazy Mouse
参数设置 | settings
新版增强 | enhancement in the new version
笔触 | Stroke
对称 | Symmetry
基本设置 | basic settings
动态对称 | dynamic symmetry
对称相关教学视频 | video tutorials on symmetry
模板 | Stencil
Z球 | Z Sphere
Z草图 | Z Sketch
DynaMesh
简介 | brief introduction
用法 | usage
参数设置 | options
DynaMesh与子工具 | DynaMesh and Subtools
教学视频 | video tutorials
Sculptris Pro
简介 | brief introduction
用法 | usage
参数设置 | settings
教学视频 | video tutorials
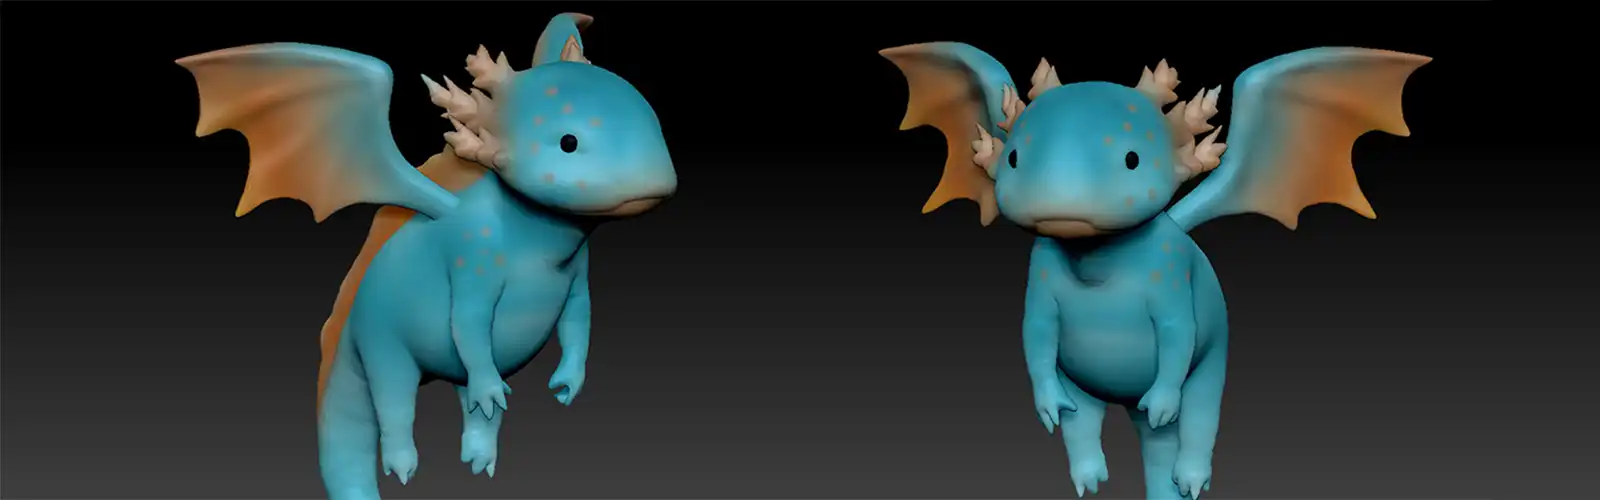
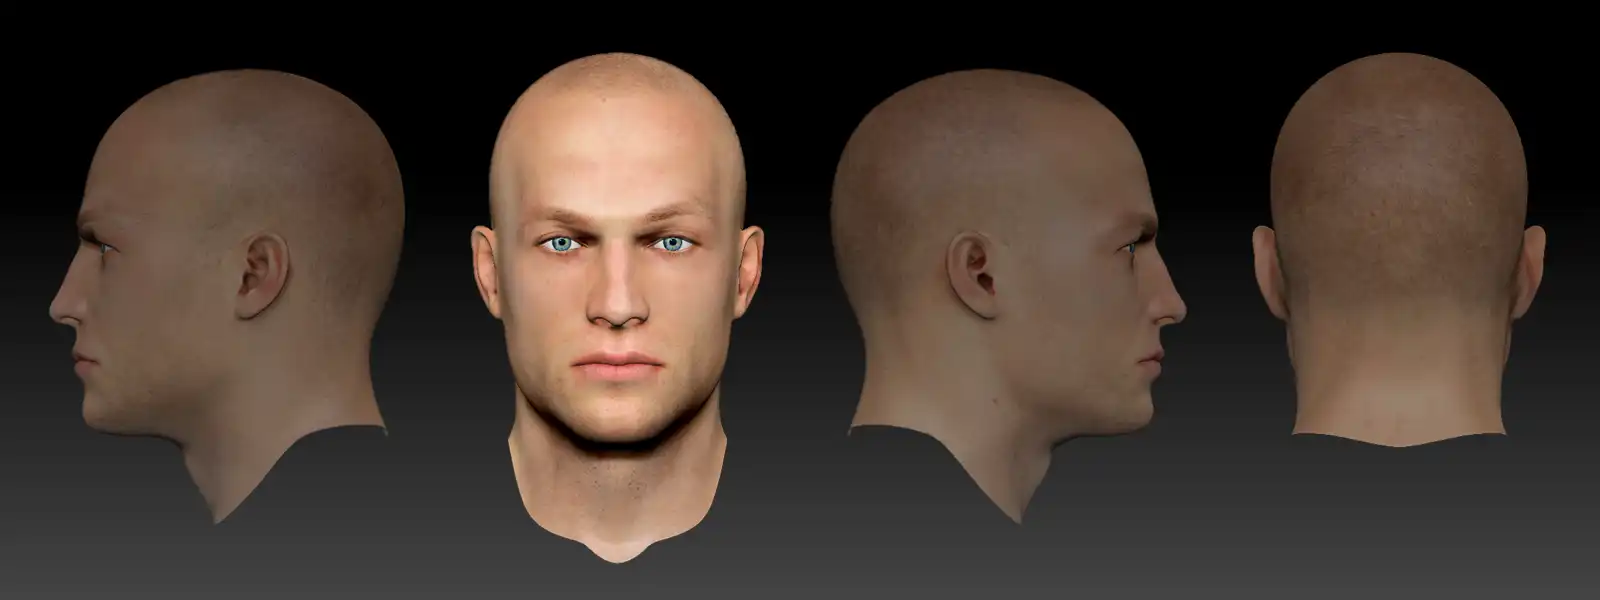
05. 在ZBrush中创建有机体模型 | Creating Organic Models in ZBrush
练习文件 | Exercise Files
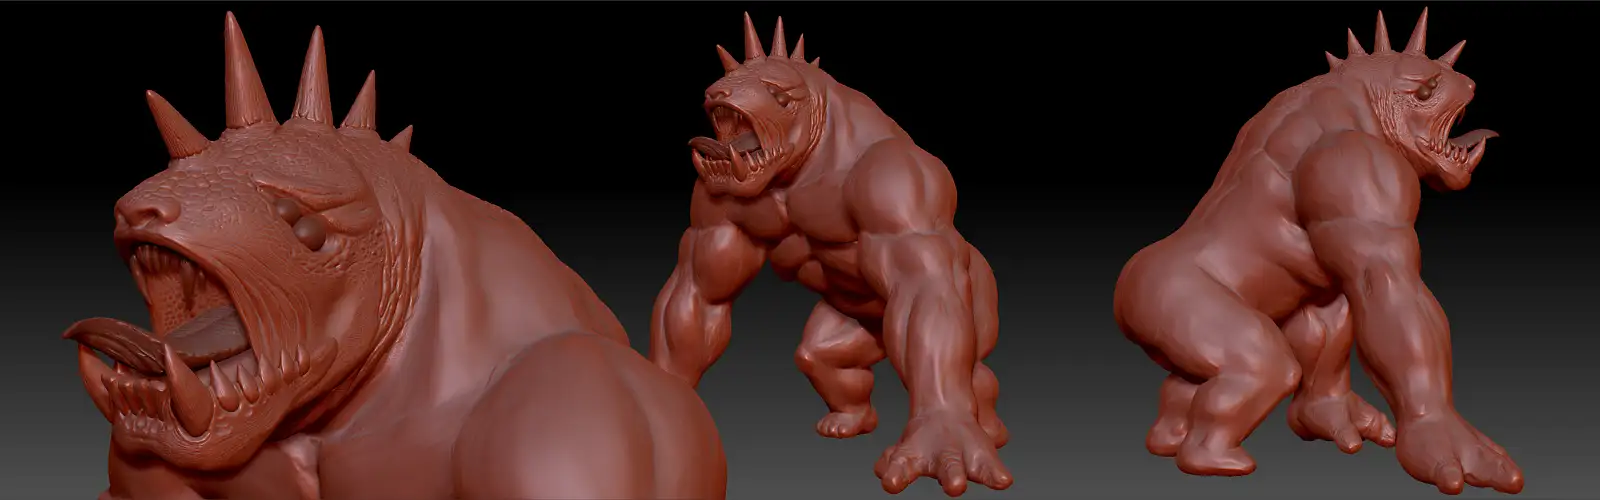
Image Plane的用法 | How to use Image Plane
Spotlight的用法 | How to use Spotlight
教学视频:如何在Zbrush中进行骨骼绑定 | video tutorial: how to use bones in Zbrush
第三方教学视频 | Third-party educational videos

基础演示:角色头像 | demonstration of basic operations: human head

《耻辱》风格角色胸像 | dishonored style bust

风格化角色胸像 | stylized character bust

如何雕刻头发 | how to sculpt hair

特警判官胸像 | bust of Judge Dredd

《权力游戏》异鬼头像 | White Walker from Game of Thrones

怪物角色胸像 | monster character bust

外星人胸像 | alien character bust
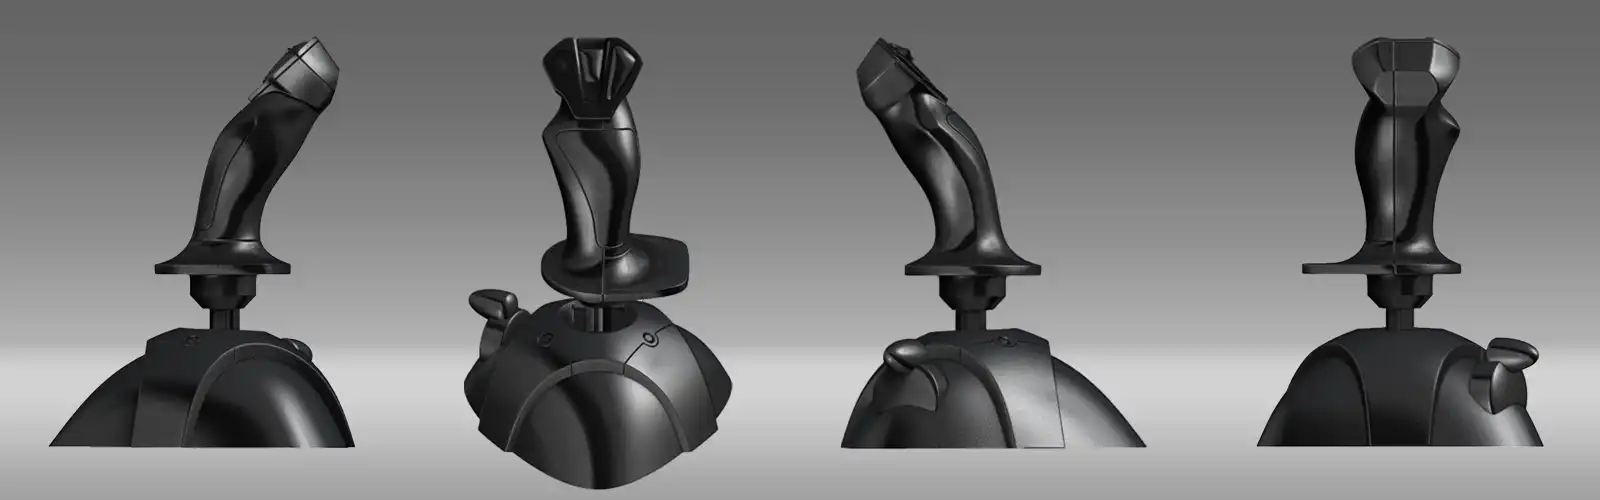
06. ZBrush的硬表面雕刻功能 | Hard Surface Modeling Functions in ZBrush
ShadowBox
Snapshot3D
Live Boolean
Panel Loops
PolyGroupIt
Bevel Pro
Noise Maker
ZModeler
Dynamic Subdivision
Others
ArrayMesh
Curve
Dynamics
FiberMesh
InsertMesh
NanoMesh
Posing & Animation
Projection Master
Tessimate
07. 在ZBrush中创建硬表面模型 | Creating Hard Surface Models in ZBrush
练习文件 | Exercise Files
第三方教学视频 | Third-party educational videos


08. 在ZBrush中整理UV和绘制贴图 | UV Unwrapping and Texture Painting in ZBrush
UV基础练习文件 | Exercise Files for the basics of UV
UV Master练习文件 | Exercise Files for UV Master
Polypaint练习文件 | Exercise Files for Polypaint
Spotlight的用法 | How to use Spotlight
ZAppLink的用法 | How to use ZAppLink
第三方教学视频 | Third-party educational videos


表面绘制技术 | Painting Techniques


09. ZBrush中的材质、灯光与渲染 | Materials, Lights and Rendering in ZBrush
Matcap练习文件 | Exercise Files for Matcap


![red satin fabric [landscape]](http://www.daelab.cn/wp-content/uploads/2023/11/2023_CourseIntro_DigitalSculpt_Matcap3.jpg "red satin fabric [landscape]")


第三方教学视频 | Third-party educational videos


使用材质混合 | using the mixer


理解LightCap | understanding lightcaps

基于图片的灯光 | imaged based lighting

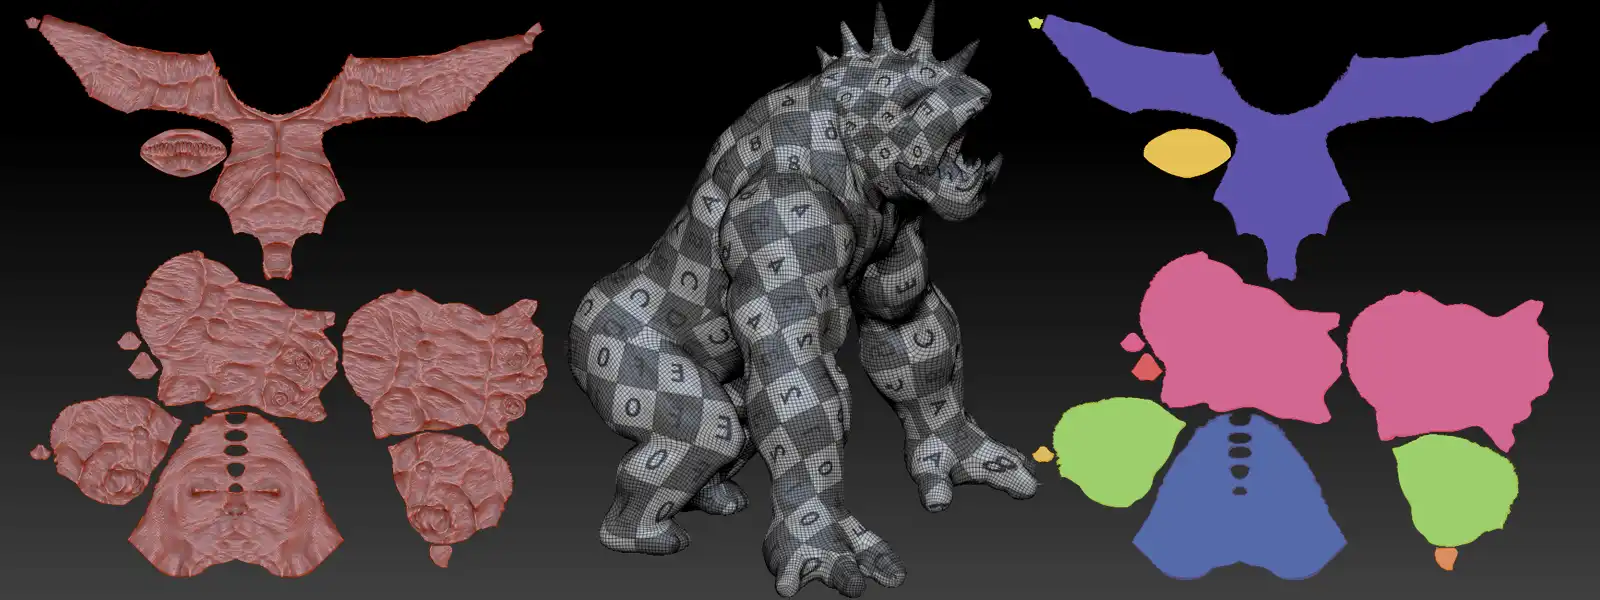
10. 重拓扑与贴图烘焙 | Retopology and Texture-baking
重拓扑练习文件 | Exercise Files for Retoplogy
拓扑笔刷的用法 | How to use Topology Brush
使用Z球重拓扑 | Retopology using ZSphere
使用Zmodeler拓扑 | Retopology using Zmodeler
使用TopoGun3进行重拓扑(1) | Retopology with TopoGun3 (1)
使用TopoGun3进行重拓扑(2) | Retopology with TopoGun3 (2)
使用Blender进行重拓扑 | Retopology with Blender
更多Topogun教学视频 | More video tutorials on Topogun
11. 模型拆分与准备 | Splitting and Preparing the Model
12. 3D打印 | 3D Printing
13. 打磨与涂装 | Polishing and Painting
14. 模型整合 | Integration
学习任务 | Learning Tasks
9月5日(第一周) | Sep. 5 (Week 1)
9月12日(第二周) | Sep. 12 (Week 2)
10月3日前使用在线腾讯文档提交设计方案 | submit your design proposal using the online Tencent Doc app by Oct. 3
(若无法查看或编辑表格,请先登录 | If you cannot view or edit the table, please log in first.)
9月19日(第三周) | Sep. 19 (Week 3)
复习与自学 | review and self-study
使用“学习资料 → 03. ZBrush简介”复习并自学课上未详细展开的内容 |
Use the content in “Learning Materials → 03. An Introduction to ZBrush” to review and self-study the content not elaborated in class.
9月26日(第四周) | Sep. 26 (Week 4)
复习与自学 | review and self-study
使用“学习资料 → 04. ZBrush中的基础建模与雕刻功能”进行4.1与4.2节的复习并自学课上未详细展开的内容 |
Use the content of 4.1 and 4.2 in “Learning Materials → 04. Fundamental Modeling and Sculpting Functions in ZBrush” to review and self-study the content not elaborated in class.
10月3日(第五周) | Oct. 3 (Week 5)
国庆假日 | National Day Holiday
10月10日(第六周) | Oct. 10 (Week 6)
修改设计方案 | Design Revision
根据任课教师反馈意见修改设计方案 | Revise the design based on the feedback from the teacher.
10月17日(第七周) | Oct. 17 (Week 7)
复习 | review
使用“学习资料 → 05. 在ZBrush中创建有机体模型”完成角色雕刻练习 |
Use the content in “Learning Materials → 05. Creating Organic Models in Zbrush” to finish the character sculpting exercise.
10月24日(第八周) | Oct. 24 (Week 8)
复习 | review
使用“学习资料 → 06. ZBrush中的硬表面雕刻功能 / 07. 在Zbrush中创建硬表面模型”完成硬表面雕刻练习 |
Use the content in “Learning Materials → 06. Hard Surface Modeling Functions in ZBRush / 07. Creating Hard Surface Models in ZBrush” to finish the hard surface sculpting exercise.
10月31日(第九周) | Nov. 31 (Week 9)
复习与自学 | review and self-study
使用“学习资料 → 08. 在ZBrush中整理UV和绘制贴图”完成相关练习 |
Use the content in “Learning Materials → 08. UV Unwrapping and Texture Painting in ZBrush” to finish the relevant exercises.
11月7日(第十周) | Nov. 7 (Week 10)
复习与自学 | review and self-study
使用“学习资料 → 09. ZBrush中的材质、灯光与渲染 / 10. 重拓扑与贴图烘焙”完成相关内容学习 |
Use the content in “Learning Materials → 09. Materials, Lights and Rendering in ZBrush / 10. Retopology and Texture-baking” to learn the relevant content.
11月14日(第十一周) | Nov. 14 (Week 11)
检查后修改模型 | modify your model after the mid-term evaluation
根据老师提出的建议修改完善ZBrush模型,为三维打印做好准备 | Polish the ZBrush model based on the suggestions given by the teachers in the mid-term evaluation.
11月21日(第十二周) | Nov. 21 (Week 12)
拆分模型 | split the model
完成模型拆分并提交三维打印 | Split your model into parts, and submit them to 3D printing.
11月28日(第十三周) | Nov. 28 (Week 13)
打磨模型 | polish the model
打磨模型并消除三维打印瑕疵 | Polish your model and eliminate 3D printing artifacts.
12月5日(第十四周) | Dec. 5 (Week 14)
打磨模型 | polish the model
继续完成打磨工作 | Continue to finish the polish.
12月12日(第十五周) | Dec. 12 (Week 15)
涂装上色 | paint and colorize your model
使用画笔、喷笔等工具对模型进行上色 | Colorize your model with brushes and air brushes.
12月19日(第十六周) | Dec. 19 (Week 16)
涂装上色与整合 | paint and assemble your model
继续完成上色工作并将模型部件整合为完整形态 | Continue to colorize your model and them assemble the model parts.
12月26日(第十七周) | Dec. 26 (Week 17)
最终完善与渲染 | final perfection and rendering
完成实物模型的完善、效果图的渲染并提交成果 | Finish the final perfection and rendering. Submit the result.
课程成果 | Learning Outcomes
待本学期课程结束后提供 | To be provided after the course of this semester is over.